
Help Center · Stories and clips
Create a story and arrange clips
A story is the sequence of clips your viewers see one after the other, by tap or swipe. Every story has its own link.
Create a story
- Open Stories and click New story.
- Enter a title. It shows top left in the player.
- The slug is the part of the link after your address, e.g.
summerforyour-name.swypecast.com/summer. It is suggested from the title. Next to the field you see Available when it is free. - Click Create story. The story starts as a draft.
The editor has four tabs: Clips, Settings, Profile and Share. On the right the preview runs in a phone frame.
Add clips
- In the Clips tab click Add from library.
- Search or sort (Recently added or Name A–Z), switch between grid and list, and pick clips.
- Confirm with add. The clips appear as a list with thumbnail, kind and length.
No suitable clips yet? Upload new leads to the upload, and the finished clips go straight into this story. You can also put clips into stories from the library, see The library.
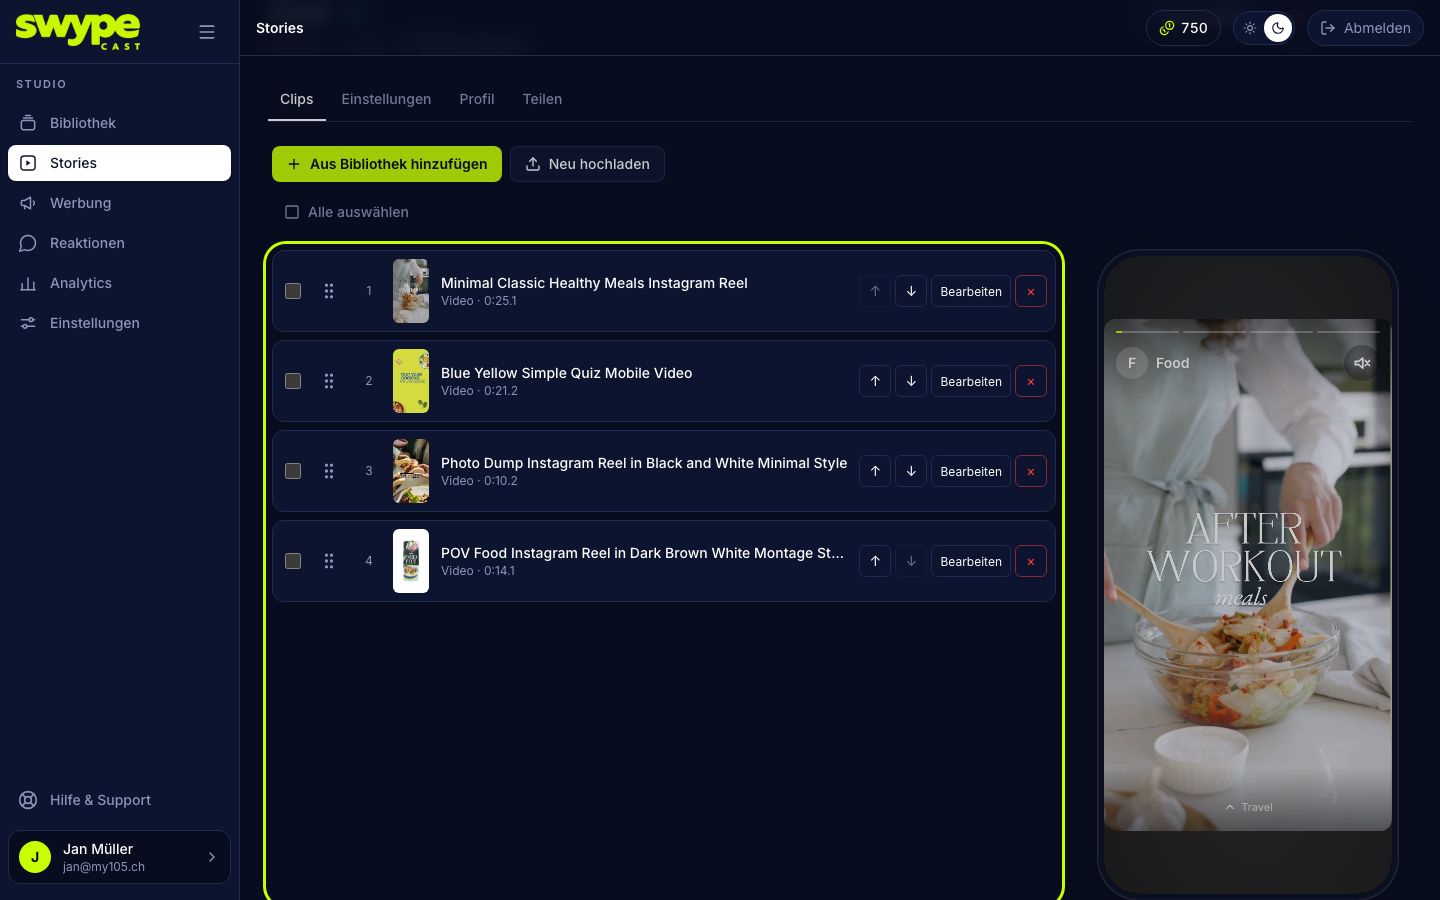
Change the order
- Drag a row by the grip on the left, up or down.
- Or use the arrows in the row.
- Keyboard: focus the grip, Space, arrow keys, Space.
The order is saved at once; the preview on the right shows the result.
Edit or remove clips
- Edit (or clicking the row) opens the clip in a window with title, tags, thumbnail and button, without leaving the editor. Escape or a click outside closes it.
- The × removes the clip from this story only; it stays in the library.
- Several at once: tick them or use Select all, then Remove from story.
Change title and slug later
Below the title at the top of the editor, click Change title/slug, adjust both and click Save. Careful: a changed slug changes the direct link, and old links with the old slug stop working. The short link and the QR code from the Share tab, on the other hand, always point to the story, whatever it is called, see Publish and share.