
Help Center · Stories and clips
Text, filter and insert
These three tabs shape the picture of a clip: writing text, laying a filter over the background and inserting pictures, GIFs, videos or stickers. All of it is rendered into the video.
Where to find it
In the editor, in the tabs Text, Filter and Insert.
Text
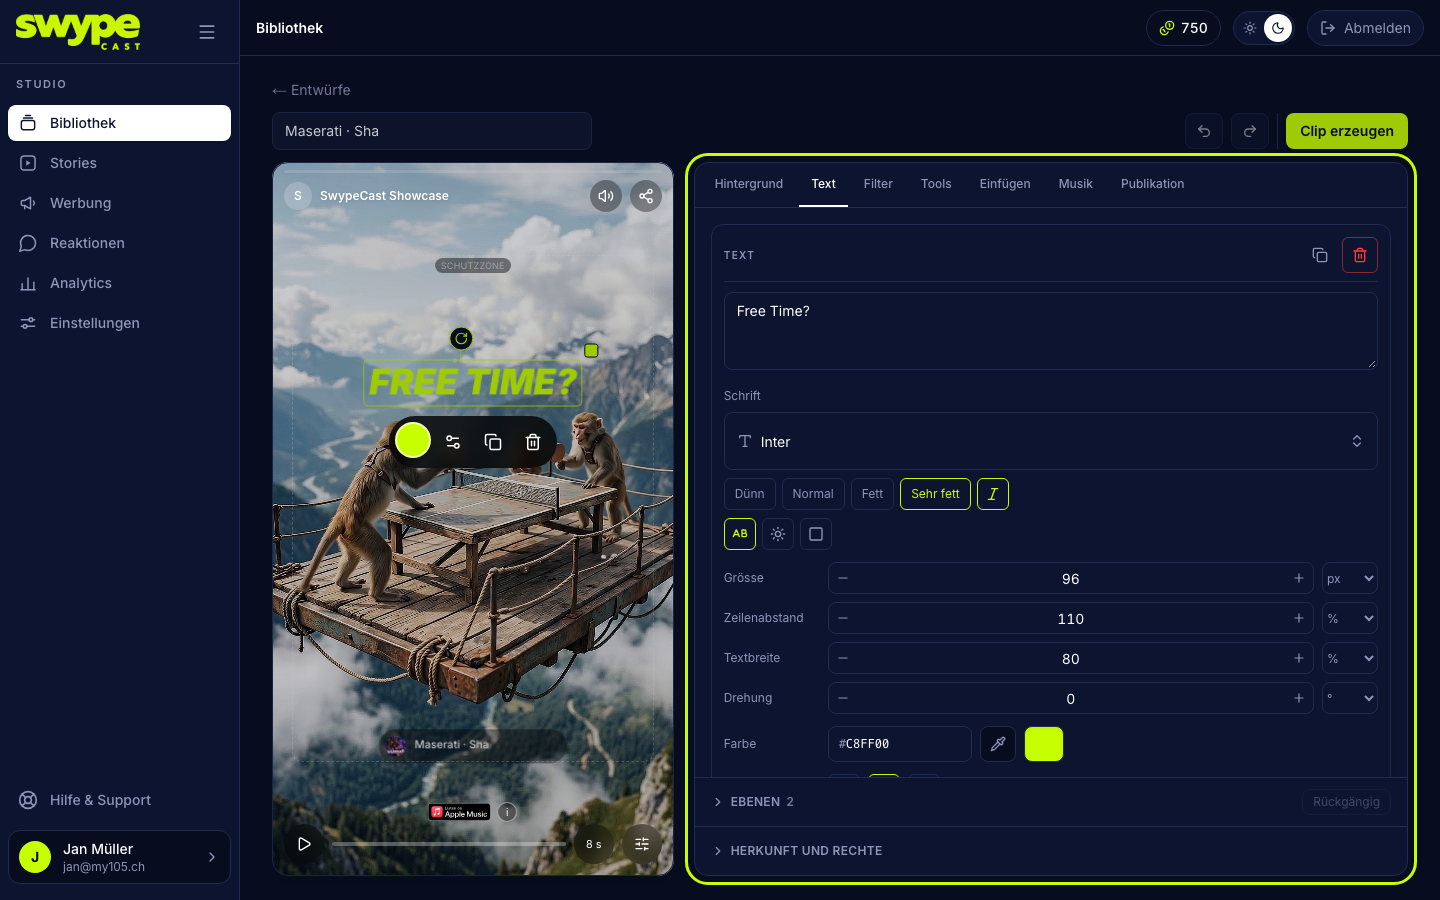
- Click Add text. A new text lies on the stage, and the tab holds the text field you write in.
- A click on a text on the stage selects it and opens the Text tab with its fields. Dragging moves the text, the grip above the frame turns it, the square at the top right corner changes its size.
- Under Font you choose the typeface. The list shows every name in its own face; on a phone it opens as a sheet of its own with a search field.
- Below you set the weight (Thin, Regular, Bold, Extra bold), plus Italic, Caps, Shadow and Plate.
- Size, Line height, Text width and Rotation are number fields with presets. Then Colour and Alignment.
The colour is chosen the same way everywhere: the field shows the hex code, beside it the pipette (picks a colour straight from the picture or video on the stage) and the colour dot, which opens the colour picker with a saturation field, a hue slider and the quick colours: your organisation's brand colours first, then the ones used last, then the classics. The colour dot also sits in the toolbar right under a selected text.
You upload your own fonts under Settings → Player at Own fonts. They are then available in the player and in the editor. Own fonts come with the Pro plan and above; all other fonts come from Google Fonts.
Filter
- Choose a preset: Original, Clear, Warm, Cool, Vivid, Soft, Black and white, Sepia, Film or Drama. Each tile shows the filter on your background.
- The Fine-tune button opens the sliders for Brightness, Contrast, Saturation, Warmth, Vignette, Grain and Blur.
- Reset brings everything back to the start.
Filters act on the background. Text and inserted media stay as they are.
Insert
- If a medium is selected, it stands at the top of the tab with Size, Opacity, Rotation, Shape and Remove. Below you choose the source: Stickers, Mine or Stock.
- Stickers are animated emojis (Noto Animated Emoji by Google, CC BY 4.0). Mine shows your videos and pictures from the library, plus the organisation's logo, with the upload row at the top (JPG, PNG, WebP, GIF, MP4 and MOV). Stock searches Pixabay.
- A tap on a tile puts the medium on the stage and, on a phone, closes the sheet. Drag it into place, turn and scale it with the grips. The toolbar under the medium holds crop, settings, duplicate and delete.
- Under Shape you crop the medium: Original, 1:1, 4:5, 9:16 or 16:9. With Crop (or a double click on the medium, a long press on a phone) you move and zoom the picture inside the frame. Done or Escape ends it.
At most ten media per clip. GIFs and videos play in the finished clip. Under Mine you delete one of your files with the bin as long as it is not in a story; otherwise an info icon shows where it lies.